Table of Contents
- Introduction
- Database
- Views
- Form Processing
- Customize your app’s look and feel
- Customizing admin panel
- The
djoserlibrary - The
rest_frameworkModule
Introduction
- Check the Django version:
python -m django --version
Create a new Django project
To create a new Django project, run the following command:
django-admin startproject <project_name>
Here’s the project structure:
<project name>/
    manage.py
    <project name>/
        __init__.py
        settings.py
        urls.py
        asgi.py
        wsgi.py
These files are:
- The outer
mysite/root directory is a container for your project. Its name doesn’t matter to Django; you can rename it to anything you like. manage.py: A command-line utility that lets you interact with this Django project in various ways. You can read all the details aboutmanage.pyin django-admin and manage.py.- The inner
mysite/directory is the actual Python package for your project. Its name is the Python package name you’ll need to use to import anything inside it (e.g.mysite.urls). mysite/__init__.py: An empty file that tells Python that this directory should be considered a Python package. If you’re a Python beginner, read more about packages in the official Python docs.mysite/settings.py: Settings/configuration for this Django project. Django settings will tell you all about how settings work.mysite/urls.py: The URL declarations for this Django project; a “table of contents” of your Django-powered site. You can read more about URLs in URL dispatcher.mysite/asgi.py: An entry-point for ASGI-compatible web servers to serve your project. See How to deploy with ASGI for more details.mysite/wsgi.py: An entry-point for WSGI-compatible web servers to serve your project. See How to deploy with WSGI for more details.
The development server
To verufy if your project is working, you can run the following command:
python manage.py runserver
A local server will be started on port 8000, and you can access it by visiting http://127.0.0.1:8000/ in your browser.
Create a new app
- So far, you’ve only created a Django project, but you can also create a new app.
- Each application you write in Django consists of a Python package that follows a certain convention. Django comes with a utility that automatically generates the basic directory structure of an app, so you can focus on writing code rather than creating directories.
Projects vs. apps
- What’s the difference between a project and an app? An app is a web application that does something – e.g., a blog system, a database of public records or a small poll app. A project is a collection of configuration and apps for a particular website. A project can contain multiple apps. An app can be in multiple projects.
To create your app, make sure you’re in the same directory as manage.py and type this command:
django-admin startapp <app_name>
Here’s the app structure:
<project name>/
    manage.py
    <project name>/
	__init__.py
	settings.py
	urls.py
	asgi.py
	wsgi.py
    <app name>/
	__init__.py
	admin.py
	apps.py
	migrations/
	    __init__.py
	models.py
	views.py
	urls.py
	tests.py
Simplest app in Django, write this in <app name>/views.py:
from django.http import HttpResponse


def index(request):
    return HttpResponse("Hello, world. You're at the polls index.")
In order to show this view, add it under <app name>/urls.py:
from django.urls import path

from . import views

urlpatterns = [
    path('', views.index, name='index'),
]
The next step is to point the root URLconf at the <app name>/urls.py module. In <project name>/urls.py, add an import for django.urls.include and insert an include() call in the urlpatterns list.
from django.contrib import admin
from django.urls import include, path

urlpatterns = [
    path('<app name>/', include('<app name>.urls')),
    path('admin/', admin.site.urls),
]
Database
- Database setup is done in
<project name>/settings.py. - By default, Django uses SQLite for its database.
- If you wish to use another database, install the appropriate database bindings and change the following keys in the
DATABASES'default'item to match your database connection settings:ENGINE– Either'django.db.backends.sqlite3','django.db.backends.postgresql','django.db.backends.mysql', or'django.db.backends.oracle'. Other backends are also available.NAME– The name of your database. If you’re using SQLite, the database will be a file on your computer; in that case,NAMEshould be the full absolute path, including filename, of that file. The default value,BASE_DIR / 'db.sqlite3', will store the file in your project directory.
- By default, INSTALLED_APPS contains some basic apps. These applications are included by default as a convenience for the common case.
- Some of these applications make use of at least one database table, though, so we need to create the tables in the database before we can use them. To do that, run the following command:
python manage.py migrate
- The
migratecommand looks at theINSTALLED_APPSsetting and creates any necessary database tables according to the database settings in your<project name>/settings.pyfile and the database migrations shipped with the app.
Create a new model
Note: For a complete guide on Django models, check out this page.
Now we’ll define your models – essentially, your database layout, with additional metadata.
Philosophy
A model is the single, definitive source of information about your data. It contains the essential fields and behaviors of the data you’re storing. Django follows the DRY Principle. The goal is to define your data model in one place and automatically derive things from it.
This includes the migrations - unlike in Ruby On Rails, for example, migrations are entirely derived from your models file, and are essentially a history that Django can roll through to update your database schema to match your current models.
- You create models in Python classes. They’re defined in the
<app name>/models.pyfile. - The class name should be the same as the table name in the database.
- The class name should be in CamelCase.
- Model fields are defined in the class body, using the
Fieldclass.
from django.db import models

class Question(models.Model):
    question_text = models.CharField(max_length=200)
    pub_date = models.DateTimeField('date published')


class Choice(models.Model):
    question = models.ForeignKey(Question, on_delete=models.CASCADE)
    choice_text = models.CharField(max_length=200)
    votes = models.IntegerField(default=0)
- Here, each model is represented by a class that subclasses
django.db.models.Model. Each model has a number of class variables, each of which represents a database field in the model. - Each field is represented by an instance of a
Fieldclass – e.g.,CharFieldfor character fields andDateTimeFieldfor datetimes. This tells Django what type of data each field holds. - The name of each
Fieldinstance (e.g.question_textorpub_date) is the field’s name, in machine-friendly format. You’ll use this value in your Python code, and your database will use it as the column name.
Activating models
- First, you need to tell your Django project that your app is installed. You should list it under the
INSTALLED_APPSinsettings. - You’d put your app config under
<app name>/apps.py. - Now, Django knows to include your app.
- Now, you bring (migrate) you app’s models with the following command:
python manage.py makemigrations <app name>
- By running
makemigrations, you’re telling Django that you’ve made some changes to your models (in this case, you’ve made new ones) and that you’d like the changes to be stored as a migration.- Migrations are how Django stores changes to your models (and thus your database schema) - they’re files on disk. You can read the migration for your new model if you like; it’s the file
<app name>/migrations/0001_initial.py. Don’t worry, you’re not expected to read them every time Django makes one, but they’re designed to be human-editable in case you want to manually tweak how Django changes things.
- Migrations are how Django stores changes to your models (and thus your database schema) - they’re files on disk. You can read the migration for your new model if you like; it’s the file
- Now, run
migrateagain to create those model tables in your database.- The
migratecommand takes all the migrations that haven’t been applied (Django tracks which ones are applied using a special table in your database calleddjango_migrations) and runs them against your database - essentially, synchronizing the changes you made to your models with the schema in the database.
- The
To summarize, here are the main steps to create a new model:
- Change your models (in
models.py). - Run
python manage.py makemigrationsto create migrations for those changes - Run
python manage.py migrateto apply those changes to the database.
Note: You can use $ python manage.py shell to interact with your database and models.
Here’s a sample of a model:
import datetime

from django.db import models
from django.utils import timezone

# Create your models here.
class Question(models.Model):
    question_text = models.CharField(max_length=200)
    pub_date = models.DateTimeField('date published')

    def __str__(self):
        return self.question_text

    def was_published_recently(self):
        return self.pub_date >= timezone.now() - datetime.timedelta(days=1)


class Choice(models.Model):
    question = models.ForeignKey(Question, on_delete=models.CASCADE)
    choice_text = models.CharField(max_length=200)
    votes = models.IntegerField(default=0)

    def __str__(self):
        return self.choice_text
Note: It’s important to add __str__() methods to your models, not only for your own convenience when dealing with the interactive prompt, but also because objects’ representations are used throughout Django’s automatically-generated admin.
Meta options
Give your model metadata by using an inner class Meta, like so:
from django.db import models

class Ox(models.Model):
    horn_length = models.IntegerField()

    class Meta:
        ordering = ["horn_length"]
        verbose_name_plural = "oxen"
Model metadata is “anything that’s not a field”, such as ordering options (ordering), database table name (db_table), or human-readable singular and plural names (verbose_name and verbose_name_plural). None are required, and adding class Meta to a model is completely optional.
A complete list of all possible Meta options can be found in the model option reference.
Model methods
Define custom methods on a model to add custom “row-level” functionality to your objects. Whereas Manager methods are intended to do “table-wide” things, model methods should act on a particular model instance.
This is a valuable technique for keeping business logic in one place – the model.
For example, this model has a few custom methods:
from django.db import models

class Person(models.Model):
    first_name = models.CharField(max_length=50)
    last_name = models.CharField(max_length=50)
    birth_date = models.DateField()

    def baby_boomer_status(self):
        "Returns the person's baby-boomer status."
        import datetime
        if self.birth_date < datetime.date(1945, 8, 1):
            return "Pre-boomer"
        elif self.birth_date < datetime.date(1965, 1, 1):
            return "Baby boomer"
        else:
            return "Post-boomer"

    @property
    def full_name(self):
        "Returns the person's full name."
        return '%s  %s' % (self.first_name, self.last_name)
The last method in this example is a property.
The django_extensions Module
- With
django_extensions, you can do more stuff on your models. - For example, you get visualize the database schema for an app with the following command:
python manage.py graph_models <app name> -o <output name>.png
- Note: You can also use
python manage.py graph_modelsto get a graph of all your models. - Note: You should put
django_extensionsin yourINSTALLED_APPSlist. - Note: For more information on model relations, see Accessing related objects. For more on how to use double underscores to perform field lookups via the API, see Field lookups. For full details on the database API, see our Database API reference.
Djano Admin
Philosophy
Generating admin sites for your staff or clients to add, change, and delete content is tedious work that doesn’t require much creativity. For that reason, Django entirely automates creation of admin interfaces for models.
Django was written in a newsroom environment, with a very clear separation between “content publishers” and the “public” site. Site managers use the system to add news stories, events, sports scores, etc., and that content is displayed on the public site. Django solves the problem of creating a unified interface for site administrators to edit content.
The admin isn’t intended to be used by site visitors. It’s for site managers.
- Creating an admin user
python manage.py createsuperuser - Start a development server
python manage.py runserver- Now, go to
http://127.0.0.1:8000/admin/in your browser, and login with your admin user.
- Now, go to
In order to use the admin interface for the models in your app, you need to tell admin about the model objects that you want to have an admin interface for.
Here’s an example of how to do that. You should do it in the <app name>/admin.py file:
from django.contrib import admin

from .models import Question

admin.site.register(Question)
Views
What is a view?
- Views are webpages in Django application.
- Contents are delivered through Views in Django.
- A URL pattern is a general form of a URL:
/newsarchive/<year>/<month>/ - Django uses
URLconfsto go from URL to views, it maps URL patterns to views. - The views are added in the
<django app name>/views.pyfile. - Example of
urlpatternsin the<django app name>/urls.pyfile:
urlpatterns = [
    # ex: /polls/
    path('', views.index, name='index'),
    # ex: /polls/5/
    path('<int:question_id>/', views.detail, name='detail'),
    # ex: /polls/5/results/
    path('<int:question_id>/results/', views.results, name='results'),
]
- Note:
<int:question_id>is a regular expression that matches an integer. Django sends it as a keyword argument to the view function.
Write views that acutally do something
Each view is responsible for doing one of two things:
- Returning an
HttpResponseobject containing the content for the requested page, or - Raising an exception such as Http404. The rest is up to you.
Your view can:
- Read records from a database, or not.
- It can use a template system such as Django’s – or a third-party Python template system – or not.
- It can generate a PDF file, output XML, create a ZIP file on the fly,
- Or anything you want, using whatever Python libraries you want.
All Django wants is that HttpResponse, Or an exception.
- Note:
HttpResponseis a Django class that is used to return a response to the client. - Note:
Http404is a Django exception that is raised when a page is not found. - Note:
HttpResponseRedirectis a Django class that is used to redirect the client to another page. - Note: In order to NOT hard code the page’s desgin, we use Dajngo’s template system.
- Note:
render()is a Django function that is used to render a template.
Django’s template system
- First, you need to create a
templatesfolder in the<django app name>folder.- By convention
DjangoTemplateslooks for a “templates” subdirectory in each of theINSTALLED_APPS.
- By convention
- Default templates settings is like this:
TEMPLATES = [
    {
        'BACKEND': 'django.template.backends.django.DjangoTemplates',
        'APP_DIRS': True,
    },
]
- You need to create another directory in the
templatesfolder called<django app name>.- Under that directory, create an
index.htmlfile. This is where you put your template code. - Check out below for an example of a template.
- Under that directory, create an
{% if latest_question_list %}
    <ul>
    {% for question in latest_question_list %}
        <li><a href="/polls/{{ question.id }}/">{{ question.question_text }}</a></li>
    {% endfor %}
    </ul>
{% else %}
    <p>No polls are available.</p>
{% endif %}
- After creating the template, you need to update the index view in
<django app name>/views.pyfile to use the template.
Raising a 404 error
- If the page doesn’t exist, you can raise a
Http404exception. This will tell Django to display the 404 page. - There are two ways to raise a
Http404exception:- By using the
raise Http404statement in the view function. - By using the
get_object_or_404()shortcut.
- By using the
from django.http import Http404
from django.shortcuts import render

#...

def detail(request, question_id):
    try:
        question = Question.objects.get(pk=question_id)
    except Question.DoesNotExist:
        raise Http404("Question does not exist")
    return render(request, 'polls/detail.html', {'question': question})
from django.shortcuts import get_object_or_404, render

from .models import Question
# ...
def detail(request, question_id):
    question = get_object_or_404(Question, pk=question_id)
    return render(request, 'polls/detail.html', {'question': question})
Removing hardcoded URLs in templates
- Since you defined the name argument in the
<django app name>/urls.pyfile, you can use it in the template. - You can remove a reliance on specific URL paths defined in your URL configurations by using the
{% url %}template tag.
Example:
This hardcoded URL:
<li><a href="/polls/{{ question.id }}/">{{ question.question_text }}</a></li>
gets converted to this:
<li><a href="{% url 'detail' question.id %}">{{ question.question_text }}</a></li>
Here, the 'detail' argument is the name of the view function.
Namespacing URL names
In real Django applications, there might be different apps which the same URL names? How does Django differentiate between them?
Django uses a namespace to separate your URLs. It adds namespaces to your URLconf, <django app name>/urls.py
To point at the namespace in a template:
{% url 'polls:detail' question.id %}
Form Processing
Let’s update our poll detail template (polls/templates/polls/detail.html) from the last tutorial, so that the template contains an HTML <form> element:
<form action="{% url 'polls:vote' question.id %}" method="post">
{% csrf_token %}
<fieldset>
    <legend><h1>{{ question.question_text }}</h1></legend>
    {% if error_message %}<p><strong>{{ error_message }}</strong></p>{% endif %}
    {% for choice in question.choice_set.all %}
        <input type="radio" name="choice" id="choice{{ forloop.counter }}" value="{{ choice.id }}">
        <label for="choice{{ forloop.counter }}">{{ choice.choice_text }}</label><br>
    {% endfor %}
</fieldset>
<input type="submit" value="Vote">
</form>
A quick rundown:
- The above template displays a radio button for each question choice. The
valueof each radio button is the associated question choice’s ID. Thenameof each radio button is"choice". That means, when somebody selects one of the radio buttons and submits the form, it’ll send the POST datachoice=#where # is the ID of the selected choice. This is the basic concept of HTML forms. - We set the form’s
actionto{% url 'polls:vote' question.id %}, and we setmethod="post". Usingmethod="post"(as opposed tomethod="get") is very important, because the act of submitting this form will alter data server-side. Whenever you create a form that alters data server-side, usemethod="post". This tip isn’t specific to Django; it’s good web development practice in general. forloop.counterindicates how many times thefortag has gone through its loop- Since we’re creating a POST form (which can have the effect of modifying data), we need to worry about Cross Site Request Forgeries. Thankfully, you don’t have to worry too hard, because Django comes with a helpful system for protecting against it. In short, all POST forms that are targeted at internal URLs should use the
{% csrf_token %}template tag.
Now, let’s create a Django view that handles the submitted data and does something with it.
polls/urls.py
path('<int:question_id>/vote/', views.vote, name='vote'),
We also created a dummy implementation of the vote() function. Let’s create a real version. Add the following to polls/views.py:
from django.http import HttpResponse, HttpResponseRedirect
from django.shortcuts import get_object_or_404, render
from django.urls import reverse

from .models import Choice, Question
# ...
def vote(request, question_id):
    question = get_object_or_404(Question, pk=question_id)
    try:
        selected_choice = question.choice_set.get(pk=request.POST['choice'])
    except (KeyError, Choice.DoesNotExist):
        # Redisplay the question voting form.
        return render(request, 'polls/detail.html', {
            'question': question,
            'error_message': "You didn't select a choice.",
        })
    else:
        selected_choice.votes += 1
        selected_choice.save()
        # Always return an HttpResponseRedirect after successfully dealing
        # with POST data. This prevents data from being posted twice if a
        # user hits the Back button.
        return HttpResponseRedirect(reverse('polls:results', args=(question.id,)))
This code includes a few things we haven’t covered yet in this tutorial:
-
request.POSTis a dictionary-like object that lets you access submitted data by key name. In this case,request.POST['choice']returns the ID of the selected choice, as a string.request.POSTvalues are always strings.Note that Django also provides
request.GETfor accessing GET data in the same way – but we’re explicitly usingrequest.POSTin our code, to ensure that data is only altered via a POST call. -
request.POST['choice']will raiseKeyErrorifchoicewasn’t provided in POST data. The above code checks forKeyErrorand redisplays the question form with an error message ifchoiceisn’t given. -
After incrementing the choice count, the code returns an
HttpResponseRedirectrather than a normalHttpResponse.HttpResponseRedirecttakes a single argument: the URL to which the user will be redirected (see the following point for how we construct the URL in this case).As the Python comment above points out, you should always return an
HttpResponseRedirectafter successfully dealing with POST data. This tip isn’t specific to Django; it’s good web development practice in general. -
We are using the
reverse()function in theHttpResponseRedirectconstructor in this example. This function helps avoid having to hardcode a URL in the view function. It is given the name of the view that we want to pass control to and the variable portion of the URL pattern that points to that view. In this case, using the URLconf we set up in Tutorial 3, thisreverse()call will return a string like
'/polls/3/results/'
- where the
3is the value ofquestion.id. This redirected URL will then call the'results'view to display the final page.
As mentioned in Tutorial 3, request is an HttpRequest object. For more on HttpRequest objects, see the request and response documentation.
After somebody votes in a question, the vote() view redirects to the results page for the question. Let’s write that view (polls/views.py):
from django.shortcuts import get_object_or_404, render

def results(request, question_id):
    question = get_object_or_404(Question, pk=question_id)
    return render(request, 'polls/results.html', {'question': question})
This is almost exactly the same as the detail() view from previous sections. The only difference is the template name. We’ll fix this redundancy later.
Now, create a polls/templates/polls/results.html template:
<h1>{{ question.question_text }}</h1>

<ul>
{% for choice in question.choice_set.all %}
    <li>{{ choice.choice_text }} -- {{ choice.votes }} vote{{ choice.votes|pluralize }}</li>
{% endfor %}
</ul>

<a href="{% url 'polls:detail' question.id %}">Vote again?</a>
Now, go to /polls/1/ in your browser and vote in the question. You should see a results page that gets updated each time you vote. If you submit the form without having chosen a choice, you should see the error message.
Note: The code for our
vote()view does have a small problem. It first gets theselected_choiceobject from the database, then computes the new value ofvotes, and then saves it back to the database. If two users of your website try to vote at exactly the same time, this might go wrong: The same value, let’s say 42, will be retrieved forvotes. Then, for both users the new value of 43 is computed and saved, but 44 would be the expected value.
This is called a race condition. If you are interested, you can read Avoiding race conditions using F() to learn how you can solve this issue.
Use generic views: Less code is better
The detail() (from previous sections) and results() views are very short – and, as mentioned above, redundant. The index() view, which displays a list of polls, is similar.
These views represent a common case of basic web development: getting data from the database according to a parameter passed in the URL, loading a template and returning the rendered template. Because this is so common, Django provides a shortcut, called the “generic views” system.
Generic views abstract common patterns to the point where you don’t even need to write Python code to write an app.
Let’s convert our poll app to use the generic views system, so we can delete a bunch of our own code. We’ll have to take a few steps to make the conversion. We will:
- Convert the URLconf.
- Delete some of the old, unneeded views.
- Introduce new views based on Django’s generic views.
Read on for details.
Why the code-shuffle? Generally, when writing a Django app, you’ll evaluate whether generic views are a good fit for your problem, and you’ll use them from the beginning, rather than refactoring your code halfway through. But this tutorial intentionally has focused on writing the views “the hard way” until now, to focus on core concepts. You should know basic math before you start using a calculator.
Amend URLconf
First, open the polls/urls.py URLconf and change it like so:
polls/urls.py[¶](https://docs.djangoproject.com/en/4.0/intro/tutorial04/#id6 "Permalink to this code")

from django.urls import path

from . import views

app_name = 'polls'
urlpatterns = [
    path('', views.IndexView.as_view(), name='index'),
    path('<int:pk>/', views.DetailView.as_view(), name='detail'),
    path('<int:pk>/results/', views.ResultsView.as_view(), name='results'),
    path('<int:question_id>/vote/', views.vote, name='vote'),
]
Note that the name of the matched pattern in the path strings of the second and third patterns has changed from <question_id> to <pk>.
Amend views
Next, we’re going to remove our old index, detail, and results views and use Django’s generic views instead. To do so, open the polls/views.py file and change it like so:
from django.http import HttpResponseRedirect
from django.shortcuts import get_object_or_404, render
from django.urls import reverse
from django.views import generic

from .models import Choice, Question

class IndexView(generic.ListView):
    template_name = 'polls/index.html'
    context_object_name = 'latest_question_list'

    def get_queryset(self):
        """Return the last five published questions."""
        return Question.objects.order_by('-pub_date')[:5]

class DetailView(generic.DetailView):
    model = Question
    template_name = 'polls/detail.html'

class ResultsView(generic.DetailView):
    model = Question
    template_name = 'polls/results.html'

def vote(request, question_id):
    ... # same as above, no changes needed.
We’re using two generic views here: ListView and DetailView. Respectively, those two views abstract the concepts of “display a list of objects” and “display a detail page for a particular type of object.”
- Each generic view needs to know what model it will be acting upon. This is provided using the
modelattribute. - The
DetailViewgeneric view expects the primary key value captured from the URL to be called"pk", so we’ve changedquestion_idtopkfor the generic views.
By default, the DetailView generic view uses a template called <app name>/<model name>_detail.html. In our case, it would use the template "polls/question_detail.html". The template_name attribute is used to tell Django to use a specific template name instead of the autogenerated default template name. We also specify the template_name for the results list view – this ensures that the results view and the detail view have a different appearance when rendered, even though they’re both a DetailView behind the scenes.
Similarly, the ListView generic view uses a default template called <app name>/<model name>_list.html; we use template_name to tell ListView to use our existing "polls/index.html" template.
In previous parts of the tutorial, the templates have been provided with a context that contains the question and latest_question_list context variables. For DetailView the question variable is provided automatically – since we’re using a Django model (Question), Django is able to determine an appropriate name for the context variable. However, for ListView, the automatically generated context variable is question_list. To override this we provide the context_object_name attribute, specifying that we want to use latest_question_list instead. As an alternative approach, you could change your templates to match the new default context variables – but it’s a lot easier to tell Django to use the variable you want.
Run the server, and use your new polling app based on generic views.
For full details on generic views, see the generic views documentation.
Customize your app’s look and feel
Aside from the HTML generated by the server, web applications generally need to serve additional files — such as images, JavaScript, or CSS — necessary to render the complete web page. In Django, we refer to these files as “static files”.
For small projects, this isn’t a big deal, because you can keep the static files somewhere your web server can find it. However, in bigger projects – especially those comprised of multiple apps – dealing with the multiple sets of static files provided by each application starts to get tricky.
That’s what django.contrib.staticfiles is for: it collects static files from each of your applications (and any other places you specify) into a single location that can easily be served in production.
First, create a directory called static in your polls directory. Django will look for static files there, similarly to how Django finds templates inside polls/templates/.
Django’s STATICFILES_FINDERS setting contains a list of finders that know how to discover static files from various sources. One of the defaults is AppDirectoriesFinder which looks for a “static” subdirectory in each of the INSTALLED_APPS, like the one in polls we just created. The admin site uses the same directory structure for its static files.
Within the static directory you have just created, create another directory called polls and within that create a file called style.css. In other words, your stylesheet should be at polls/static/polls/style.css. Because of how the AppDirectoriesFinder staticfile finder works, you can refer to this static file in Django as polls/style.css, similar to how you reference the path for templates.
Static file namespacing: Just like templates, we might be able to get away with putting our static files directly in
polls/static(rather than creating anotherpollssubdirectory), but it would actually be a bad idea. Django will choose the first static file it finds whose name matches, and if you had a static file with the same name in a different application, Django would be unable to distinguish between them. We need to be able to point Django at the right one, and the best way to ensure this is by namespacing them. That is, by putting those static files inside another directory named for the application itself.
Put the following code in that stylesheet (polls/static/polls/style.css):
li a {
    color: green;
}
Next, add the following at the top of polls/templates/polls/index.html:
{% load static %}

<link rel="stylesheet" type="text/css" href="{% static 'polls/style.css' %}">
The {% static %} template tag generates the absolute URL of static files.
That’s all you need to do for development.
Start the server (or restart it if it’s already running):
$ python manage.py runserver
Reload http://localhost:8000/polls/ and you should see that the question links are green (Django style!) which means that your stylesheet was properly loaded.
Adding background image
Next, we’ll create a subdirectory for images. Create an images subdirectory in the polls/static/polls/ directory. Inside this directory, put an image called background.gif. In other words, put your image in polls/static/polls/images/background.gif.
Then, add to your stylesheet (polls/static/polls/style.css):
body {
    background: white url("images/background.gif") no-repeat;
}
Reload http://localhost:8000/polls/ and you should see the background loaded in the top left of the screen.
Warning: The
{% static %}template tag is not available for use in static files which aren’t generated by Django, like your stylesheet. You should always use relative paths to link your static files between each other, because then you can changeSTATIC_URL(used by thestatictemplate tag to generate its URLs) without having to modify a bunch of paths in your static files as well.
These are the basics. For more details on settings and other bits included with the framework see the static files howto and the staticfiles reference. Deploying static files discusses how to use static files on a real server.
Customizing admin panel
By registering the Question model with admin.site.register(Question), Django was able to construct a default form representation. Often, you’ll want to customize how the admin form looks and works. You’ll do this by telling Django the options you want when you register the object.
Let’s see how this works by reordering the fields on the edit form. Replace the admin.site.register(Question) line with:
polls/admin.py:
from django.contrib import admin

from .models import Question


class QuestionAdmin(admin.ModelAdmin):
    fields = ['pub_date', 'question_text']

admin.site.register(Question, QuestionAdmin)
You’ll follow this pattern – create a model admin class, then pass it as the second argument to admin.site.register() – any time you need to change the admin options for a model.
This particular change above makes the “Publication date” come before the “Question” field:

This isn’t impressive with only two fields, but for admin forms with dozens of fields, choosing an intuitive order is an important usability detail.
And speaking of forms with dozens of fields, you might want to split the form up into fieldsets:
from django.contrib import admin

from .models import Question


class QuestionAdmin(admin.ModelAdmin):
    fieldsets = [
        (None,               {'fields': ['question_text']}),
        ('Date information', {'fields': ['pub_date']}),
    ]

admin.site.register(Question, QuestionAdmin)
The first element of each tuple in fieldsets is the title of the fieldset. Here’s what our form looks like now:

Adding related objects
OK, we have our Question admin page, but a Question has multiple Choices, and the admin page doesn’t display choices.
Yet.
There are two ways to solve this problem. The first is to register Choice with the admin just as we did with Question:
from django.contrib import admin

from .models import Choice, Question
# ...
admin.site.register(Choice)
Now “Choices” is an available option in the Django admin. The “Add choice” form looks like this:

In that form, the “Question” field is a select box containing every question in the database. Django knows that a ForeignKey should be represented in the admin as a <select> box. In our case, only one question exists at this point.
Also note the “Add Another” link next to “Question.” Every object with a ForeignKey relationship to another gets this for free. When you click “Add Another”, you’ll get a popup window with the “Add question” form. If you add a question in that window and click “Save”, Django will save the question to the database and dynamically add it as the selected choice on the “Add choice” form you’re looking at.
But, really, this is an inefficient way of adding Choice objects to the system. It’d be better if you could add a bunch of Choices directly when you create the Question object. Let’s make that happen.
Remove the register() call for the Choice model. Then, edit the Question registration code to read:
from django.contrib import admin

from .models import Choice, Question


class ChoiceInline(admin.StackedInline):
    model = Choice
    extra = 3


class QuestionAdmin(admin.ModelAdmin):
    fieldsets = [
        (None,               {'fields': ['question_text']}),
        ('Date information', {'fields': ['pub_date'], 'classes': ['collapse']}),
    ]
    inlines = [ChoiceInline]

admin.site.register(Question, QuestionAdmin)
This tells Django: “Choice objects are edited on the Question admin page. By default, provide enough fields for 3 choices.”
Load the “Add question” page to see how that looks:

It works like this: There are three slots for related Choices – as specified by extra – and each time you come back to the “Change” page for an already-created object, you get another three extra slots.
At the end of the three current slots you will find an “Add another Choice” link. If you click on it, a new slot will be added. If you want to remove the added slot, you can click on the X to the top right of the added slot. This image shows an added slot:

One small problem, though. It takes a lot of screen space to display all the fields for entering related Choice objects. For that reason, Django offers a tabular way of displaying inline related objects. To use it, change the ChoiceInline declaration to read:
polls/admin.py:
class ChoiceInline(admin.TabularInline):
    #...
With that TabularInline (instead of StackedInline), the related objects are displayed in a more compact, table-based format:

Note that there is an extra “Delete?” column that allows removing rows added using the “Add Another Choice” button and rows that have already been saved.
Customize the admin change list
Now that the Question admin page is looking good, let’s make some tweaks to the “change list” page – the one that displays all the questions in the system.
Here’s what it looks like at this point:
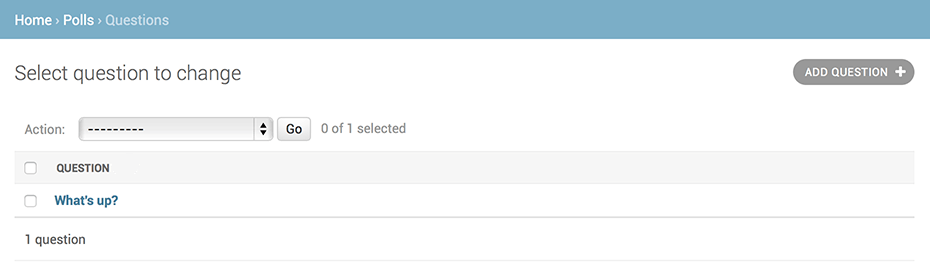
By default, Django displays the str() of each object. But sometimes it’d be more helpful if we could display individual fields. To do that, use the list_display admin option, which is a tuple of field names to display, as columns, on the change list page for the object:
class QuestionAdmin(admin.ModelAdmin):
    # ...
    list_display = ('question_text', 'pub_date')
For good measure, let’s also include the was_published_recently() method from Tutorial 2:
class QuestionAdmin(admin.ModelAdmin):
    # ...
    list_display = ('question_text', 'pub_date', 'was_published_recently')
Now the question change list page looks like this:

You can click on the column headers to sort by those values – except in the case of the was_published_recently header, because sorting by the output of an arbitrary method is not supported. Also note that the column header for was_published_recently is, by default, the name of the method (with underscores replaced with spaces), and that each line contains the string representation of the output.
You can improve that by using the display() decorator on that method (in polls/models.py), as follows:
from django.contrib import admin

class Question(models.Model):
    # ...
    @admin.display(
        boolean=True,
        ordering='pub_date',
        description='Published recently?',
    )
    def was_published_recently(self):
        now = timezone.now()
        return now - datetime.timedelta(days=1) <= self.pub_date <= now
For more information on the properties configurable via the decorator, see list_display.
Edit your polls/admin.py file again and add an improvement to the Question change list page: filters using the list_filter. Add the following line to QuestionAdmin:
list_filter = ['pub_date']
That adds a “Filter” sidebar that lets people filter the change list by the pub_date field:

The type of filter displayed depends on the type of field you’re filtering on. Because pub_date is a DateTimeField, Django knows to give appropriate filter options: “Any date”, “Today”, “Past 7 days”, “This month”, “This year”.
This is shaping up well. Let’s add some search capability:
search_fields = ['question_text']
That adds a search box at the top of the change list. When somebody enters search terms, Django will search the question_text field. You can use as many fields as you’d like – although because it uses a LIKE query behind the scenes, limiting the number of search fields to a reasonable number will make it easier for your database to do the search.
Now’s also a good time to note that change lists give you free pagination. The default is to display 100 items per page. Change list pagination, search boxes, filters, date-hierarchies, and column-header-ordering all work together like you think they should.
Customize the admin look and feel
Clearly, having “Django administration” at the top of each admin page is ridiculous. It’s just placeholder text.
You can change it, though, using Django’s template system. The Django admin is powered by Django itself, and its interfaces use Django’s own template system.
Customizing your project’s templates
Create a templates directory in your project directory (the one that contains manage.py). Templates can live anywhere on your filesystem that Django can access. (Django runs as whatever user your server runs.) However, keeping your templates within the project is a good convention to follow.
Open your settings file (mysite/settings.py, remember) and add a DIRS option in the TEMPLATES setting:
mysite/settings.py:
TEMPLATES = [
    {
        'BACKEND': 'django.template.backends.django.DjangoTemplates',
        'DIRS': [BASE_DIR / 'templates'],
        'APP_DIRS': True,
        'OPTIONS': {
            'context_processors': [
                'django.template.context_processors.debug',
                'django.template.context_processors.request',
                'django.contrib.auth.context_processors.auth',
                'django.contrib.messages.context_processors.messages',
            ],
        },
    },
]
DIRS is a list of filesystem directories to check when loading Django templates; it’s a search path.
Orgainizing templates: Just like the static files, we could have all our templates together, in one big templates directory, and it would work perfectly well. However, templates that belong to a particular application should be placed in that application’s template directory (e.g.
polls/templates) rather than the project’s (templates). We’ll discuss in more detail in the reusable apps tutorial why we do this.
Now create a directory called admin inside templates, and copy the template admin/base_site.html from within the default Django admin template directory in the source code of Django itself (django/contrib/admin/templates) into that directory.
Where are the Django source files? If you have difficulty finding where the Django source files are located on your system, run the following command:
$ python -c "import django; print(django.__path__)"
Then, edit the file and replace {{ site_header|default:_('Django administration') }} (including the curly braces) with your own site’s name as you see fit. You should end up with a section of code like:
{% block branding %}
<h1 id="site-name"><a href="{% url 'admin:index' %}">Polls Administration</a></h1>
{% endblock %}
We use this approach to teach you how to override templates. In an actual project, you would probably use the django.contrib.admin.AdminSite.site_header attribute to more easily make this particular customization.
This template file contains lots of text like {% block branding %} and {{ title }}. The {% and {{ tags are part of Django’s template language. When Django renders admin/base_site.html, this template language will be evaluated to produce the final HTML page, just like we saw in Tutorial 3.
Note that any of Django’s default admin templates can be overridden. To override a template, do the same thing you did with base_site.html – copy it from the default directory into your custom directory, and make changes.
Customizing the admin index page
On a similar note, you might want to customize the look and feel of the Django admin index page.
By default, it displays all the apps in INSTALLED_APPS that have been registered with the admin application, in alphabetical order. You may want to make significant changes to the layout. After all, the index is probably the most important page of the admin, and it should be easy to use.
The template to customize is admin/index.html. (Do the same as with admin/base_site.html in the previous section – copy it from the default directory to your custom template directory). Edit the file, and you’ll see it uses a template variable called app_list. That variable contains every installed Django app. Instead of using that, you can hard-code links to object-specific admin pages in whatever way you think is best.
The djoser library
REST implementation of Django authentication system. djoser library provides a set of Django Rest Framework views to handle basic actions such as registration, login, logout, password reset and account activation. It works with custom user model.
Note: Read the docs here
The rest_framework Module
Django REST framework is a powerful and flexible toolkit for building Web APIs.
Some reasons you might want to use REST framework:
- The Web browsable API is a huge usability win for your developers.
- Authentication policies including packages for OAuth1a and OAuth2.
- Serialization that supports both ORM and non-ORM data sources.
- Customizable all the way down - just use regular function-based views if you don’t need the more powerful features.
Installation
Install using pip, including any optional packages you want…
pip install djangorestframework
pip install markdown       # Markdown support for the browsable API.
pip install django-filter  # Filtering support
…or clone the project from github.
git clone https://github.com/encode/django-rest-framework
Add 'rest_framework' to your INSTALLED_APPS setting.
INSTALLED_APPS = [
    ...
    'rest_framework',
]
If you’re intending to use the browsable API you’ll probably also want to add REST framework’s login and logout views. Add the following to your root urls.py file.
urlpatterns = [
    ...
    path('api-auth/', include('rest_framework.urls'))
]
Note that the URL path can be whatever you want.
Any global settings for a REST framework API are kept in a single configuration dictionary named REST_FRAMEWORK. Start off by adding the following to your settings.py module:
REST_FRAMEWORK = {
    # Use Django's standard `django.contrib.auth` permissions,
    # or allow read-only access for unauthenticated users.
    'DEFAULT_PERMISSION_CLASSES': [
        'rest_framework.permissions.DjangoModelPermissionsOrAnonReadOnly'
    ]
}
Don’t forget to make sure you’ve also added rest_framework to your INSTALLED_APPS.
Example: Create a read-write API for accessing information on the users of our project.
Here’s our project’s root urls.py module:
from django.urls import path, include
from django.contrib.auth.models import User
from rest_framework import routers, serializers, viewsets

# Serializers define the API representation.
class UserSerializer(serializers.HyperlinkedModelSerializer):
    class Meta:
        model = User
        fields = ['url', 'username', 'email', 'is_staff']

# ViewSets define the view behavior.
class UserViewSet(viewsets.ModelViewSet):
    queryset = User.objects.all()
    serializer_class = UserSerializer

# Routers provide an easy way of automatically determining the URL conf.
router = routers.DefaultRouter()
router.register(r'users', UserViewSet)

# Wire up our API using automatic URL routing.
# Additionally, we include login URLs for the browsable API.
urlpatterns = [
    path('', include(router.urls)),
    path('api-auth/', include('rest_framework.urls', namespace='rest_framework'))
]
You can now open the API in your browser at http://127.0.0.1:8000/, and view your new ‘users’ API. If you use the login control in the top right corner you’ll also be able to add, create and delete users from the system.
Serialization
Note: Complete API guide is here.
Creating a model to work with
Note: For this section, we’re using a different example. We’re building an app called snippets. Here’s is the data model defined in snippets/models.py:
from django.db import models
from pygments.lexers import get_all_lexers
from pygments.styles import get_all_styles

LEXERS = [item for item in get_all_lexers() if item[1]]
LANGUAGE_CHOICES = sorted([(item[1][0], item[0]) for item in LEXERS])
STYLE_CHOICES = sorted([(item, item) for item in get_all_styles()])


class Snippet(models.Model):
    created = models.DateTimeField(auto_now_add=True)
    title = models.CharField(max_length=100, blank=True, default='')
    code = models.TextField()
    linenos = models.BooleanField(default=False)
    language = models.CharField(choices=LANGUAGE_CHOICES, default='python', max_length=100)
    style = models.CharField(choices=STYLE_CHOICES, default='friendly', max_length=100)

    class Meta:
        ordering = ['created']
We’ll also need to create an initial migration for our snippet model, and sync the database for the first time.
python manage.py makemigrations snippets
python manage.py migrate snippets
Creating a Serializer class
The first thing we need to get started on our Web API is to provide a way of serializing and deserializing the snippet instances into representations such as json. We can do this by declaring serializers that work very similar to Django’s forms. Create a file in the snippets directory named serializers.py and add the following.
from rest_framework import serializers
from snippets.models import Snippet, LANGUAGE_CHOICES, STYLE_CHOICES


class SnippetSerializer(serializers.Serializer):
    id = serializers.IntegerField(read_only=True)
    title = serializers.CharField(required=False, allow_blank=True, max_length=100)
    code = serializers.CharField(style={'base_template': 'textarea.html'})
    linenos = serializers.BooleanField(required=False)
    language = serializers.ChoiceField(choices=LANGUAGE_CHOICES, default='python')
    style = serializers.ChoiceField(choices=STYLE_CHOICES, default='friendly')

    def create(self, validated_data):
        """
        Create and return a new `Snippet` instance, given the validated data.
        """
        return Snippet.objects.create(**validated_data)

    def update(self, instance, validated_data):
        """
        Update and return an existing `Snippet` instance, given the validated data.
        """
        instance.title = validated_data.get('title', instance.title)
        instance.code = validated_data.get('code', instance.code)
        instance.linenos = validated_data.get('linenos', instance.linenos)
        instance.language = validated_data.get('language', instance.language)
        instance.style = validated_data.get('style', instance.style)
        instance.save()
        return instance
The first part of the serializer class defines the fields that get serialized/deserialized. The create() and update() methods define how fully fledged instances are created or modified when calling serializer.save()
A serializer class is very similar to a Django Form class, and includes similar validation flags on the various fields, such as required, max_length and default.
Now if we go into Django shell, we can see how serialization works:
$ python manage.py shell
We create some sample data like this:
snippet = Snippet(code='foo = "bar"\n')
snippet.save()

snippet = Snippet(code='print("hello, world")\n')
snippet.save()
And, here’s how to get the serialized data:
serializer = SnippetSerializer(snippet)
serializer.data
# {'id': 2, 'title': '', 'code': 'print("hello, world")\n', 'linenos': False, 'language': 'python', 'style': 'friendly'}
At this point we’ve translated the model instance into Python native datatypes. To finalize the serialization process we render the data into json.
from rest_framework.renderers import JSONRenderer
from rest_framework.parsers import JSONParser

content = JSONRenderer().render(serializer.data)
content
# b'{"id": 2, "title": "", "code": "print(\\"hello, world\\")\\n", "linenos": false, "language": "python", "style": "friendly"}'
Deserialization is similar. First we parse a stream into Python native datatypes…
import io

stream = io.BytesIO(content)
data = JSONParser().parse(stream)
…then we restore those native datatypes into a fully populated object instance.
serializer = SnippetSerializer(data=data)
serializer.is_valid()
# True
serializer.validated_data
# OrderedDict([('title', ''), ('code', 'print("hello, world")\n'), ('linenos', False), ('language', 'python'), ('style', 'friendly')])
serializer.save()
# <Snippet: Snippet object>
We can also serialize querysets instead of model instances. To do so we simply add a many=True flag to the serializer arguments.
serializer = SnippetSerializer(Snippet.objects.all(), many=True)
serializer.data
# [OrderedDict([('id', 1), ('title', ''), ('code', 'foo = "bar"\n'), ('linenos', False), ('language', 'python'), ('style', 'friendly')]), OrderedDict([('id', 2), ('title', ''), ('code', 'print("hello, world")\n'), ('linenos', False), ('language', 'python'), ('style', 'friendly')]), OrderedDict([('id', 3), ('title', ''), ('code', 'print("hello, world")'), ('linenos', False), ('language', 'python'), ('style', 'friendly')])]
Using ModelSerializers
Our SnippetSerializer class is replicating a lot of information that’s also contained in the Snippet model. It would be nice if we could keep our code a bit more concise.
In the same way that Django provides both Form classes and ModelForm classes, REST framework includes both Serializer classes, and ModelSerializer classes.
Let’s look at refactoring our serializer using the ModelSerializer class. Open the file snippets/serializers.py again, and replace the SnippetSerializer class with the following.
class SnippetSerializer(serializers.ModelSerializer):
    class Meta:
        model = Snippet
        fields = ['id', 'title', 'code', 'linenos', 'language', 'style']
Note: It’s important to remember that ModelSerializer classes don’t do anything particularly magical, they are simply a shortcut for creating serializer classes:
- An automatically determined set of fields.
- Simple default implementations for the
create()andupdate()methods.
Writing regular Django views using our Serializer
Let’s see how we can write some API views using our new Serializer class. For the moment we won’t use any of REST framework’s other features, we’ll just write the views as regular Django views.
Edit the snippets/views.py file, and add the following.
The root of our API is going to be a view that supports listing all the existing snippets, or creating a new snippet.
from django.http import HttpResponse, JsonResponse
from django.views.decorators.csrf import csrf_exempt
from rest_framework.parsers import JSONParser
from snippets.models import Snippet
from snippets.serializers import SnippetSerializer


@csrf_exempt
def snippet_list(request):
    """
    List all code snippets, or create a new snippet.
    """
    if request.method == 'GET':
        snippets = Snippet.objects.all()
        serializer = SnippetSerializer(snippets, many=True)
        return JsonResponse(serializer.data, safe=False)

    elif request.method == 'POST':
        data = JSONParser().parse(request)
        serializer = SnippetSerializer(data=data)
        if serializer.is_valid():
            serializer.save()
            return JsonResponse(serializer.data, status=201)
        return JsonResponse(serializer.errors, status=400)
Note that because we want to be able to POST to this view from clients that won’t have a CSRF token we need to mark the view as csrf_exempt. This isn’t something that you’d normally want to do, and REST framework views actually use more sensible behavior than this, but it’ll do for our purposes right now.
We’ll also need a view which corresponds to an individual snippet, and can be used to retrieve, update or delete the snippet.
@csrf_exempt
def snippet_detail(request, pk):
    """
    Retrieve, update or delete a code snippet.
    """
    try:
        snippet = Snippet.objects.get(pk=pk)
    except Snippet.DoesNotExist:
        return HttpResponse(status=404)

    if request.method == 'GET':
        serializer = SnippetSerializer(snippet)
        return JsonResponse(serializer.data)

    elif request.method == 'PUT':
        data = JSONParser().parse(request)
        serializer = SnippetSerializer(snippet, data=data)
        if serializer.is_valid():
            serializer.save()
            return JsonResponse(serializer.data)
        return JsonResponse(serializer.errors, status=400)

    elif request.method == 'DELETE':
        snippet.delete()
        return HttpResponse(status=204)
Finally we need to wire these views up. Create the snippets/urls.py file:
from django.urls import path
from snippets import views

urlpatterns = [
    path('snippets/', views.snippet_list),
    path('snippets/<int:pk>/', views.snippet_detail),
]
We also need to wire up the root urlconf, in the tutorial/urls.py file, to include our snippet app’s URLs.
from django.urls import path, include

urlpatterns = [
    path('', include('snippets.urls')),
]
Once we run our server, our API should send response like this:
$ http http://127.0.0.1:8000/snippets/  # used httpie (instead of curl)

HTTP/1.1 200 OK
...
[
  {
    "id": 1,
    "title": "",
    "code": "foo = \"bar\"\n",
    "linenos": false,
    "language": "python",
    "style": "friendly"
  },
  {
    "id": 2,
    "title": "",
    "code": "print(\"hello, world\")\n",
    "linenos": false,
    "language": "python",
    "style": "friendly"
  }
]


$ http http://127.0.0.1:8000/snippets/2/

HTTP/1.1 200 OK
...
{
  "id": 2,
  "title": "",
  "code": "print(\"hello, world\")\n",
  "linenos": false,
  "language": "python",
  "style": "friendly"
}
Requests and Responses
Request Objects
REST framework introduces a Request object that extends the regular HttpRequest, and provides more flexible request parsing. The core functionality of the Request object is the request.data attribute, which is similar to request.POST, but more useful for working with Web APIs.
request.POST  # Only handles form data.  Only works for 'POST' method.
request.data  # Handles arbitrary data.  Works for 'POST', 'PUT' and 'PATCH' methods.
Response Objects
REST framework also introduces a Response object, which is a type of TemplateResponse that takes unrendered content and uses content negotiation to determine the correct content type to return to the client.
return Response(data) # Renders to content type as requested by the client.
Status codes
Using numeric HTTP status codes in your views doesn’t always make for obvious reading, and it’s easy to not notice if you get an error code wrong. REST framework provides more explicit identifiers for each status code, such as HTTP_400_BAD_REQUEST in the status module. It’s a good idea to use these throughout rather than using numeric identifiers.
Wrapping API views
REST framework provides two wrappers you can use to write API views.
- The
@api_viewdecorator for working with function based views. - The
APIViewclass for working with class-based views.
These wrappers provide a few bits of functionality such as making sure you receive Request instances in your view, and adding context to Response objects so that content negotiation can be performed.
The wrappers also provide behavior such as returning 405 Method Not Allowed responses when appropriate, and handling any ParseError exceptions that occur when accessing request.data with malformed input.
Pulling it all together
Okay, let’s go ahead and start using these new components to refactor our views (views.py) slightly (using Response instead of JsonResponse and HttpResponse).
from rest_framework import status
from rest_framework.decorators import api_view
from rest_framework.response import Response
from snippets.models import Snippet
from snippets.serializers import SnippetSerializer


@api_view(['GET', 'POST'])
def snippet_list(request):
    """
    List all code snippets, or create a new snippet.
    """
    if request.method == 'GET':
        snippets = Snippet.objects.all()
        serializer = SnippetSerializer(snippets, many=True)
        return Response(serializer.data)  # --> this line has changed

    elif request.method == 'POST':
        serializer = SnippetSerializer(data=request.data)
        if serializer.is_valid():
            serializer.save()
            return Response(serializer.data, status=status.HTTP_201_CREATED)  # --> this line has changed
        return Response(serializer.errors, status=status.HTTP_400_BAD_REQUEST)  # --> this line has changed

@api_view(['GET', 'PUT', 'DELETE'])
def snippet_detail(request, pk):
    """
    Retrieve, update or delete a code snippet.
    """
    try:
        snippet = Snippet.objects.get(pk=pk)
    except Snippet.DoesNotExist:
        return Response(status=status.HTTP_404_NOT_FOUND)  # --> This line has changed

    if request.method == 'GET':
        serializer = SnippetSerializer(snippet)
        return Response(serializer.data)  # --> This line has changed

    elif request.method == 'PUT':
        serializer = SnippetSerializer(snippet, data=request.data)
        if serializer.is_valid():
            serializer.save()
            return Response(serializer.data)
        return Response(serializer.errors, status=status.HTTP_400_BAD_REQUEST)  # --> This line has changed

    elif request.method == 'DELETE':
        snippet.delete()
        return Response(status=status.HTTP_204_NO_CONTENT)  # --> This line has changed
Note: Notice that we’re no longer explicitly tying our requests or responses to a given content type. request.data can handle incoming json requests, but it can also handle other formats.
Adding optional format suffixes to our URLs
To take advantage of the fact that our responses are no longer hardwired to a single content type let’s add support for format suffixes to our API endpoints. Using format suffixes gives us URLs that explicitly refer to a given format, and means our API will be able to handle URLs such as http://example.com/api/items/4.json.
Start by adding a format keyword argument to both of the views, like so.
def snippet_list(request, format=None):
and
def snippet_detail(request, pk, format=None):
Now update the snippets/urls.py file slightly, to append a set of format_suffix_patterns in addition to the existing URLs.
from django.urls import path
from rest_framework.urlpatterns import format_suffix_patterns
from snippets import views

urlpatterns = [
    path('snippets/', views.snippet_list),
    path('snippets/<int:pk>', views.snippet_detail),
]

urlpatterns = format_suffix_patterns(urlpatterns)
We don’t necessarily need to add these extra url patterns in, but it gives us a simple, clean way of referring to a specific format.
We can control the format of the response that we get back, either by using the Accept header:
http http://127.0.0.1:8000/snippets/ Accept:application/json  # Request JSON
http http://127.0.0.1:8000/snippets/ Accept:text/html         # Request HTML
Similarly, we can control the format of the request that we send, using the Content-Type header.
# POST using form data
http --form POST http://127.0.0.1:8000/snippets/ code="print(123)"

{
  "id": 3,
  "title": "",
  "code": "print(123)",
  "linenos": false,
  "language": "python",
  "style": "friendly"
}

# POST using JSON
http --json POST http://127.0.0.1:8000/snippets/ code="print(456)"

{
    "id": 4,
    "title": "",
    "code": "print(456)",
    "linenos": false,
    "language": "python",
    "style": "friendly"
}
Class-based Views
We can also write our API views using class-based views, rather than function based views. As we’ll see this is a powerful pattern that allows us to reuse common functionality, and helps us keep our code DRY.
We’ll start by rewriting the root view as a class-based view. All this involves is a little bit of refactoring of views.py.
from snippets.models import Snippet
from snippets.serializers import SnippetSerializer
from django.http import Http404
from rest_framework.views import APIView
from rest_framework.response import Response
from rest_framework import status


class SnippetList(APIView):
    """
    List all snippets, or create a new snippet.
    """
    def get(self, request, format=None):
        snippets = Snippet.objects.all()
        serializer = SnippetSerializer(snippets, many=True)
        return Response(serializer.data)

    def post(self, request, format=None):
        serializer = SnippetSerializer(data=request.data)
        if serializer.is_valid():
            serializer.save()
            return Response(serializer.data, status=status.HTTP_201_CREATED)
        return Response(serializer.errors, status=status.HTTP_400_BAD_REQUEST)
So far, so good. It looks pretty similar to the previous case, but we’ve got better separation between the different HTTP methods. We’ll also need to update the instance view in views.py.
class SnippetDetail(APIView):
    """
    Retrieve, update or delete a snippet instance.
    """
    def get_object(self, pk):
        try:
            return Snippet.objects.get(pk=pk)
        except Snippet.DoesNotExist:
            raise Http404

    def get(self, request, pk, format=None):
        snippet = self.get_object(pk)
        serializer = SnippetSerializer(snippet)
        return Response(serializer.data)

    def put(self, request, pk, format=None):
        snippet = self.get_object(pk)
        serializer = SnippetSerializer(snippet, data=request.data)
        if serializer.is_valid():
            serializer.save()
            return Response(serializer.data)
        return Response(serializer.errors, status=status.HTTP_400_BAD_REQUEST)

    def delete(self, request, pk, format=None):
        snippet = self.get_object(pk)
        snippet.delete()
        return Response(status=status.HTTP_204_NO_CONTENT)
Again, it’s still pretty similar to the function based view right now.
Note: We’ll also need to refactor our snippets/urls.py slightly now that we’re using class-based views.
from django.urls import path
from rest_framework.urlpatterns import format_suffix_patterns
from snippets import views

urlpatterns = [
    path('snippets/', views.SnippetList.as_view()),
    path('snippets/<int:pk>/', views.SnippetDetail.as_view()),
]

urlpatterns = format_suffix_patterns(urlpatterns)
Using mixins
One of the big wins of using class-based views is that it allows us to easily compose reusable bits of behaviour.
The create/retrieve/update/delete operations that we’ve been using so far are going to be pretty similar for any model-backed API views we create. Those bits of common behaviour are implemented in REST framework’s mixin classes.
from snippets.models import Snippet
from snippets.serializers import SnippetSerializer
from rest_framework import mixins
from rest_framework import generics

class SnippetList(mixins.ListModelMixin,
                  mixins.CreateModelMixin,
                  generics.GenericAPIView):
    queryset = Snippet.objects.all()
    serializer_class = SnippetSerializer

    def get(self, request, *args, **kwargs):
        return self.list(request, *args, **kwargs)

    def post(self, request, *args, **kwargs):
        return self.create(request, *args, **kwargs)
We’re building our view using GenericAPIView, and adding in ListModelMixin and CreateModelMixin.
The base class provides the core functionality, and the mixin classes provide the .list() and .create() actions. We’re then explicitly binding the get and post methods to the appropriate actions.
class SnippetDetail(mixins.RetrieveModelMixin,
                    mixins.UpdateModelMixin,
                    mixins.DestroyModelMixin,
                    generics.GenericAPIView):
    queryset = Snippet.objects.all()
    serializer_class = SnippetSerializer

    def get(self, request, *args, **kwargs):
        return self.retrieve(request, *args, **kwargs)

    def put(self, request, *args, **kwargs):
        return self.update(request, *args, **kwargs)

    def delete(self, request, *args, **kwargs):
        return self.destroy(request, *args, **kwargs)
Again we’re using the GenericAPIView class to provide the core functionality, and adding in mixins to provide the .retrieve(), .update() and .destroy() actions.
Using generic class-based views
Using the mixin classes we’ve rewritten the views to use slightly less code than before, but we can go one step further. REST framework provides a set of already mixed-in generic views that we can use to trim down our views.py module even more.
from snippets.models import Snippet
from snippets.serializers import SnippetSerializer
from rest_framework import generics


class SnippetList(generics.ListCreateAPIView):
    queryset = Snippet.objects.all()
    serializer_class = SnippetSerializer


class SnippetDetail(generics.RetrieveUpdateDestroyAPIView):
    queryset = Snippet.objects.all()
    serializer_class = SnippetSerializer
Authentication and Permissions
Currently our API doesn’t have any restrictions on who can edit or delete code snippets. We’d like to have some more advanced behavior in order to make sure that:
- Code snippets are always associated with a creator.
- Only authenticated users may create snippets.
- Only the creator of a snippet may update or delete it.
- Unauthenticated requests should have full read-only access.
Adding information to our model
We’re going to make a couple of changes to our Snippet model class. First, let’s add a couple of fields. One of those fields will be used to represent the user who created the code snippet. The other field will be used to store the highlighted HTML representation of the code.
Add the following two fields to the Snippet model in models.py.
owner = models.ForeignKey('auth.User', related_name='snippets', on_delete=models.CASCADE)
highlighted = models.TextField()
We’d also need to make sure that when the model is saved, that we populate the highlighted field, using the pygments code highlighting library.
We’ll need some extra imports:
from pygments.lexers import get_lexer_by_name
from pygments.formatters.html import HtmlFormatter
from pygments import highlight
And now we can add a .save() method to our model class:
def save(self, *args, **kwargs):
    """
    Use the `pygments` library to create a highlighted HTML
    representation of the code snippet.
    """
    lexer = get_lexer_by_name(self.language)
    linenos = 'table' if self.linenos else False
    options = {'title': self.title} if self.title else {}
    formatter = HtmlFormatter(style=self.style, linenos=linenos,
                              full=True, **options)
    self.highlighted = highlight(self.code, lexer, formatter)
    super().save(*args, **kwargs)
When that’s all done we’ll need to update our database tables. Normally, we’d create a database migration in order to do that, but for the purposes of this tutorial, let’s just delete the database and start again.
rm -f db.sqlite3
rm -r snippets/migrations
python manage.py makemigrations snippets
python manage.py migrate
You might also want to create a few different users, to use for testing the API. The quickest way to do this will be with the createsuperuser command.
python manage.py createsuperuser
Adding endpoints for our User models
Now that we’ve got some users to work with, we’d better add representations of those users to our API. Creating a new serializer is easy. In serializers.py add:
from django.contrib.auth.models import User

class UserSerializer(serializers.ModelSerializer):
    snippets = serializers.PrimaryKeyRelatedField(many=True, queryset=Snippet.objects.all())

    class Meta:
        model = User
        fields = ['id', 'username', 'snippets']
Because 'snippets' is a reverse relationship on the User model, it will not be included by default when using the ModelSerializer class, so we needed to add an explicit field for it.
We’ll also add a couple of views to views.py. We’d like to just use read-only views for the user representations, so we’ll use the ListAPIView and RetrieveAPIView generic class-based views.
from django.contrib.auth.models import User


class UserList(generics.ListAPIView):
    queryset = User.objects.all()
    serializer_class = UserSerializer


class UserDetail(generics.RetrieveAPIView):
    queryset = User.objects.all()
    serializer_class = UserSerializer
Make sure to also import the UserSerializer class
from snippets.serializers import UserSerializer
Finally we need to add those views into the API, by referencing them from the URL conf. Add the following to the patterns in snippets/urls.py.
path('users/', views.UserList.as_view()),
path('users/<int:pk>/', views.UserDetail.as_view()),
Associating Snippets with Users
Right now, if we created a code snippet, there’d be no way of associating the user that created the snippet, with the snippet instance. The user isn’t sent as part of the serialized representation, but is instead a property of the incoming request.
The way we deal with that is by overriding a .perform_create() method on our snippet views, that allows us to modify how the instance save is managed, and handle any information that is implicit in the incoming request or requested URL.
On the SnippetList view class, add the following method:
def perform_create(self, serializer):
    serializer.save(owner=self.request.user)
The create() method of our serializer will now be passed an additional 'owner' field, along with the validated data from the request.
Updating our serializer
Now that snippets are associated with the user that created them, let’s update our SnippetSerializer to reflect that. Add the following field to the serializer definition in serializers.py:
owner = serializers.ReadOnlyField(source='owner.username')
Note: Make sure you also add 'owner', to the list of fields in the inner Meta class.
This field is doing something quite interesting. The source argument controls which attribute is used to populate a field, and can point at any attribute on the serialized instance. It can also take the dotted notation shown above, in which case it will traverse the given attributes, in a similar way as it is used with Django’s template language.
The field we’ve added is the untyped ReadOnlyField class, in contrast to the other typed fields, such as CharField, BooleanField etc… The untyped ReadOnlyField is always read-only, and will be used for serialized representations, but will not be used for updating model instances when they are deserialized. We could have also used CharField(read_only=True) here.
Adding required permissions to views
Now that code snippets are associated with users, we want to make sure that only authenticated users are able to create, update and delete code snippets.
REST framework includes a number of permission classes that we can use to restrict who can access a given view. In this case the one we’re looking for is IsAuthenticatedOrReadOnly, which will ensure that authenticated requests get read-write access, and unauthenticated requests get read-only access.
First add the following import in the views module
from rest_framework import permissions
Then, add the following property to both the SnippetList and SnippetDetail view classes.
permission_classes = [permissions.IsAuthenticatedOrReadOnly]
Adding login to the Browsable API
If you open a browser and navigate to the browsable API at the moment, you’ll find that you’re no longer able to create new code snippets. In order to do so we’d need to be able to login as a user.
We can add a login view for use with the browsable API, by editing the URLconf in our project-level urls.py file.
Add the following import at the top of the file:
from django.urls import path, include
And, at the end of the file, add a pattern to include the login and logout views for the browsable API.
urlpatterns += [
    path('api-auth/', include('rest_framework.urls')),
]
The 'api-auth/' part of pattern can actually be whatever URL you want to use.
Now if you open up the browser again and refresh the page you’ll see a ‘Login’ link in the top right of the page. If you log in as one of the users you created earlier, you’ll be able to create code snippets again.
Once you’ve created a few code snippets, navigate to the ‘/users/’ endpoint, and notice that the representation includes a list of the snippet ids that are associated with each user, in each user’s ‘snippets’ field.
Object level permissions
Really we’d like all code snippets to be visible to anyone, but also make sure that only the user that created a code snippet is able to update or delete it.
To do that we’re going to need to create a custom permission.
In the snippets app, create a new file, permissions.py
from rest_framework import permissions


class IsOwnerOrReadOnly(permissions.BasePermission):
    """
    Custom permission to only allow owners of an object to edit it.
    """

    def has_object_permission(self, request, view, obj):
        # Read permissions are allowed to any request,
        # so we'll always allow GET, HEAD or OPTIONS requests.
        if request.method in permissions.SAFE_METHODS:
            return True

        # Write permissions are only allowed to the owner of the snippet.
        return obj.owner == request.user
Now we can add that custom permission to our snippet instance endpoint, by editing the permission_classes property on the SnippetDetail view class:
permission_classes = [permissions.IsAuthenticatedOrReadOnly,
                      IsOwnerOrReadOnly]
Make sure to also import the IsOwnerOrReadOnly class.
from snippets.permissions import IsOwnerOrReadOnly
Now, if you open a browser again, you find that the ‘DELETE’ and ‘PUT’ actions only appear on a snippet instance endpoint if you’re logged in as the same user that created the code snippet.
Authenticating with the API
Because we now have a set of permissions on the API, we need to authenticate our requests to it if we want to edit any snippets. We haven’t set up any authentication classes, so the defaults are currently applied, which are SessionAuthentication and BasicAuthentication.
When we interact with the API through the web browser, we can login, and the browser session will then provide the required authentication for the requests.
If we’re interacting with the API programmatically we need to explicitly provide the authentication credentials on each request.
If we try to create a snippet without authenticating, we’ll get an error:
http POST http://127.0.0.1:8000/snippets/ code="print(123)"

{
    "detail": "Authentication credentials were not provided."
}
We can make a successful request by including the username and password of one of the users we created earlier.
http -a admin:password123 POST http://127.0.0.1:8000/snippets/ code="print(789)"

{
    "id": 1,
    "owner": "admin",
    "title": "foo",
    "code": "print(789)",
    "linenos": false,
    "language": "python",
    "style": "friendly"
}
Relationships & Hyperlinked APIs
At the moment relationships within our API are represented by using primary keys. In this part of the tutorial we’ll improve the cohesion and discoverability of our API, by instead using hyperlinking for relationships.
Creating an endpoint for the root of our API
Right now we have endpoints for ‘snippets’ and ‘users’, but we don’t have a single entry point to our API. To create one, we’ll use a regular function-based view and the @api_view decorator we introduced earlier. In your snippets/views.py add:
from rest_framework.decorators import api_view
from rest_framework.response import Response
from rest_framework.reverse import reverse


@api_view(['GET'])
def api_root(request, format=None):
    return Response({
        'users': reverse('user-list', request=request, format=format),
        'snippets': reverse('snippet-list', request=request, format=format)
    })
Two things should be noticed here. First, we’re using REST framework’s reverse function in order to return fully-qualified URLs; second, URL patterns are identified by convenience names that we will declare later on in our snippets/urls.py.
Creating an endpoint for the highlighted snippets
The other obvious thing that’s still missing from our pastebin API is the code highlighting endpoints.
Unlike all our other API endpoints, we don’t want to use JSON, but instead just present an HTML representation. There are two styles of HTML renderer provided by REST framework, one for dealing with HTML rendered using templates, the other for dealing with pre-rendered HTML. The second renderer is the one we’d like to use for this endpoint.
The other thing we need to consider when creating the code highlight view is that there’s no existing concrete generic view that we can use. We’re not returning an object instance, but instead a property of an object instance.
Instead of using a concrete generic view, we’ll use the base class for representing instances, and create our own .get() method. In your snippets/views.py add:
from rest_framework import renderers

class SnippetHighlight(generics.GenericAPIView):
    queryset = Snippet.objects.all()
    renderer_classes = [renderers.StaticHTMLRenderer]

    def get(self, request, *args, **kwargs):
        snippet = self.get_object()
        return Response(snippet.highlighted)
As usual we need to add the new views that we’ve created in to our URLconf. We’ll add a url pattern for our new API root in snippets/urls.py:
path('', views.api_root),
And then add a url pattern for the snippet highlights:
path('snippets/<int:pk>/highlight/', views.SnippetHighlight.as_view()),
Hyperlinking our API
Dealing with relationships between entities is one of the more challenging aspects of Web API design. There are a number of different ways that we might choose to represent a relationship:
- Using primary keys.
- Using hyperlinking between entities.
- Using a unique identifying slug field on the related entity.
- Using the default string representation of the related entity.
- Nesting the related entity inside the parent representation.
- Some other custom representation.
REST framework supports all of these styles, and can apply them across forward or reverse relationships, or apply them across custom managers such as generic foreign keys.
In this case we’d like to use a hyperlinked style between entities. In order to do so, we’ll modify our serializers to extend HyperlinkedModelSerializer instead of the existing ModelSerializer.
The HyperlinkedModelSerializer has the following differences from ModelSerializer:
- It does not include the
idfield by default. - It includes a
urlfield, usingHyperlinkedIdentityField. - Relationships use
HyperlinkedRelatedField, instead ofPrimaryKeyRelatedField.
We can easily re-write our existing serializers to use hyperlinking. In your snippets/serializers.py add:
class SnippetSerializer(serializers.HyperlinkedModelSerializer):
    owner = serializers.ReadOnlyField(source='owner.username')
    highlight = serializers.HyperlinkedIdentityField(view_name='snippet-highlight', format='html')

    class Meta:
        model = Snippet
        fields = ['url', 'id', 'highlight', 'owner',
                  'title', 'code', 'linenos', 'language', 'style']


class UserSerializer(serializers.HyperlinkedModelSerializer):
    snippets = serializers.HyperlinkedRelatedField(many=True, view_name='snippet-detail', read_only=True)

    class Meta:
        model = User
        fields = ['url', 'id', 'username', 'snippets']
Notice that we’ve also added a new 'highlight' field. This field is of the same type as the url field, except that it points to the 'snippet-highlight' url pattern, instead of the 'snippet-detail' url pattern.
Because we’ve included format suffixed URLs such as '.json', we also need to indicate on the highlight field that any format suffixed hyperlinks it returns should use the '.html' suffix.
Making sure our URL patterns are named
If we’re going to have a hyperlinked API, we need to make sure we name our URL patterns. Let’s take a look at which URL patterns we need to name.
- The root of our API refers to
'user-list'and'snippet-list'. - Our snippet serializer includes a field that refers to
'snippet-highlight'. - Our user serializer includes a field that refers to
'snippet-detail'. - Our snippet and user serializers include
'url'fields that by default will refer to'{model_name}-detail', which in this case will be'snippet-detail'and'user-detail'.
After adding all those names into our URLconf, our final snippets/urls.py file should look like this:
from django.urls import path
from rest_framework.urlpatterns import format_suffix_patterns
from snippets import views

# API endpoints
urlpatterns = format_suffix_patterns([
    path('', views.api_root),
    path('snippets/',
        views.SnippetList.as_view(),
        name='snippet-list'),
    path('snippets/<int:pk>/',
        views.SnippetDetail.as_view(),
        name='snippet-detail'),
    path('snippets/<int:pk>/highlight/',
        views.SnippetHighlight.as_view(),
        name='snippet-highlight'),
    path('users/',
        views.UserList.as_view(),
        name='user-list'),
    path('users/<int:pk>/',
        views.UserDetail.as_view(),
        name='user-detail')
])
Adding pagination
The list views for users and code snippets could end up returning quite a lot of instances, so really we’d like to make sure we paginate the results, and allow the API client to step through each of the individual pages.
We can change the default list style to use pagination, by modifying our tutorial/settings.py file slightly. Add the following setting:
REST_FRAMEWORK = {
    'DEFAULT_PAGINATION_CLASS': 'rest_framework.pagination.PageNumberPagination',
    'PAGE_SIZE': 10
}
Note that settings in REST framework are all namespaced into a single dictionary setting, named REST_FRAMEWORK, which helps keep them well separated from your other project settings.
We could also customize the pagination style if we needed to, but in this case we’ll just stick with the default.
ViewSets and Routers
REST framework includes an abstraction for dealing with ViewSets, that allows the developer to concentrate on modeling the state and interactions of the API, and leave the URL construction to be handled automatically, based on common conventions.
Note: ViewSet classes are almost the same thing as View classes, except that they provide operations such as retrieve, or update, and not method handlers such as get or put.
A ViewSet class is only bound to a set of method handlers at the last moment, when it is instantiated into a set of views, typically by using a Router class which handles the complexities of defining the URL conf for you.
Refactoring to use ViewSets
Let’s take our current set of views, and refactor them into view sets.
First of all let’s refactor our UserList and UserDetail views into a single UserViewSet. We can remove the two views, and replace them with a single class:
from rest_framework import viewsets

class UserViewSet(viewsets.ReadOnlyModelViewSet):
    """
    This viewset automatically provides `list` and `retrieve` actions.
    """
    queryset = User.objects.all()
    serializer_class = UserSerializer
Note: Here we’ve used the ReadOnlyModelViewSet class to automatically provide the default ‘read-only’ operations. We’re still setting the queryset and serializer_class attributes exactly as we did when we were using regular views, but we no longer need to provide the same information to two separate classes.
Next we’re going to replace the SnippetList, SnippetDetail and SnippetHighlight view classes. We can remove the three views, and again replace them with a single class.
from rest_framework.decorators import action
from rest_framework.response import Response
from rest_framework import permissions

class SnippetViewSet(viewsets.ModelViewSet):
    """
    This viewset automatically provides `list`, `create`, `retrieve`,
    `update` and `destroy` actions.

    Additionally we also provide an extra `highlight` action.
    """
    queryset = Snippet.objects.all()
    serializer_class = SnippetSerializer
    permission_classes = [permissions.IsAuthenticatedOrReadOnly,
                          IsOwnerOrReadOnly]

    @action(detail=True, renderer_classes=[renderers.StaticHTMLRenderer])
    def highlight(self, request, *args, **kwargs):
        snippet = self.get_object()
        return Response(snippet.highlighted)

    def perform_create(self, serializer):
        serializer.save(owner=self.request.user)
Note: This time we’ve used the ModelViewSet class in order to get the complete set of default read and write operations.
Note: Notice that we’ve also used the @action decorator to create a custom action, named highlight. This decorator can be used to add any custom endpoints that don’t fit into the standard create/update/delete style.
Note: Custom actions which use the @action decorator will respond to GET requests by default. We can use the methods argument if we wanted an action that responded to POST requests.
Note: The URLs for custom actions by default depend on the method name itself. If you want to change the way url should be constructed, you can include url_path as a decorator keyword argument.
Binding ViewSets to URLs explicitly
The handler methods only get bound to the actions when we define the URLConf. To see what’s going on under the hood let’s first explicitly create a set of views from our ViewSets.
In the snippets/urls.py file we bind our ViewSet classes into a set of concrete views.
from snippets.views import SnippetViewSet, UserViewSet, api_root
from rest_framework import renderers

snippet_list = SnippetViewSet.as_view({
    'get': 'list',
    'post': 'create'
})
snippet_detail = SnippetViewSet.as_view({
    'get': 'retrieve',
    'put': 'update',
    'patch': 'partial_update',
    'delete': 'destroy'
})
snippet_highlight = SnippetViewSet.as_view({
    'get': 'highlight'
}, renderer_classes=[renderers.StaticHTMLRenderer])
user_list = UserViewSet.as_view({
    'get': 'list'
})
user_detail = UserViewSet.as_view({
    'get': 'retrieve'
})
Notice how we’re creating multiple views from each ViewSet class, by binding the http methods to the required action for each view.
Now that we’ve bound our resources into concrete views, we can register the views with the URL conf as usual.
urlpatterns = format_suffix_patterns([
    path('', api_root),
    path('snippets/', snippet_list, name='snippet-list'),
    path('snippets/<int:pk>/', snippet_detail, name='snippet-detail'),
    path('snippets/<int:pk>/highlight/', snippet_highlight, name='snippet-highlight'),
    path('users/', user_list, name='user-list'),
    path('users/<int:pk>/', user_detail, name='user-detail')
])
Using Routers
Because we’re using ViewSet classes rather than View classes, we actually don’t need to design the URL conf ourselves. The conventions for wiring up resources into views and urls can be handled automatically, using a Router class. All we need to do is register the appropriate view sets with a router, and let it do the rest.
Here’s our re-wired snippets/urls.py file.
from django.urls import path, include
from rest_framework.routers import DefaultRouter
from snippets import views

# Create a router and register our viewsets with it.
router = DefaultRouter()
router.register(r'snippets', views.SnippetViewSet)
router.register(r'users', views.UserViewSet)

# The API URLs are now determined automatically by the router.
urlpatterns = [
    path('', include(router.urls)),
]
Registering the viewsets with the router is similar to providing a urlpattern. We include two arguments - the URL prefix for the views, and the viewset itself.
Note: The DefaultRouter class we’re using also automatically creates the API root view for us, so we can now delete the api_root method from our views module.
Trade-offs between views vs viewsets
Using viewsets can be a really useful abstraction. It helps ensure that URL conventions will be consistent across your API, minimizes the amount of code you need to write, and allows you to concentrate on the interactions and representations your API provides rather than the specifics of the URL conf.
That doesn’t mean it’s always the right approach to take. There’s a similar set of trade-offs to consider as when using class-based views instead of function based views. Using viewsets is less explicit than building your views individually.
For a simple example refer to this example.